
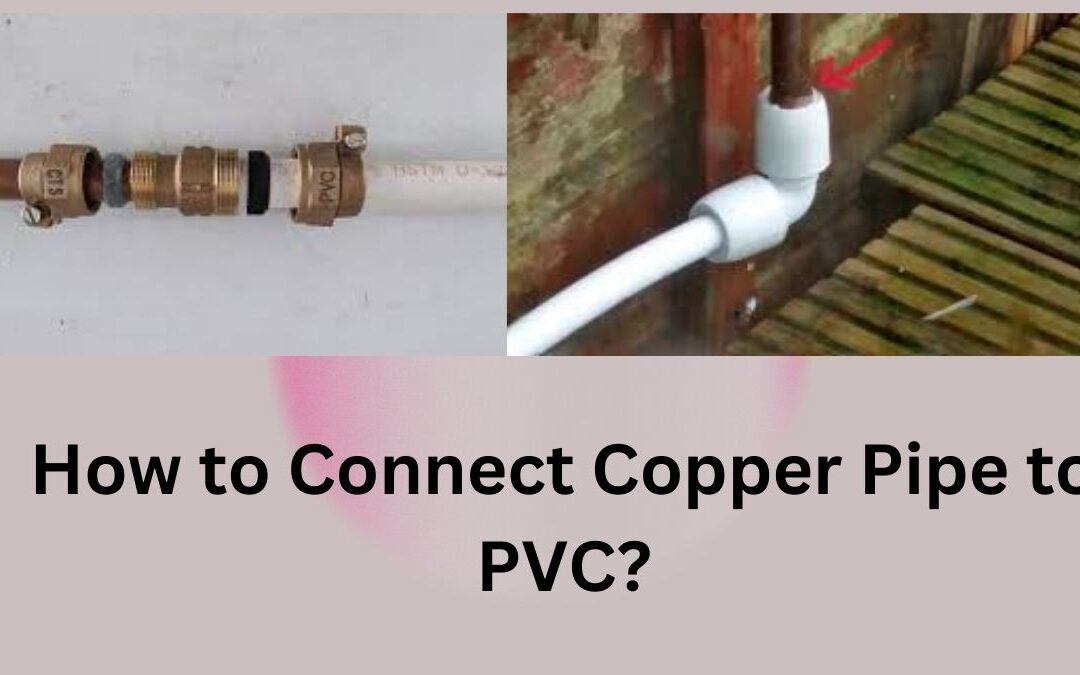
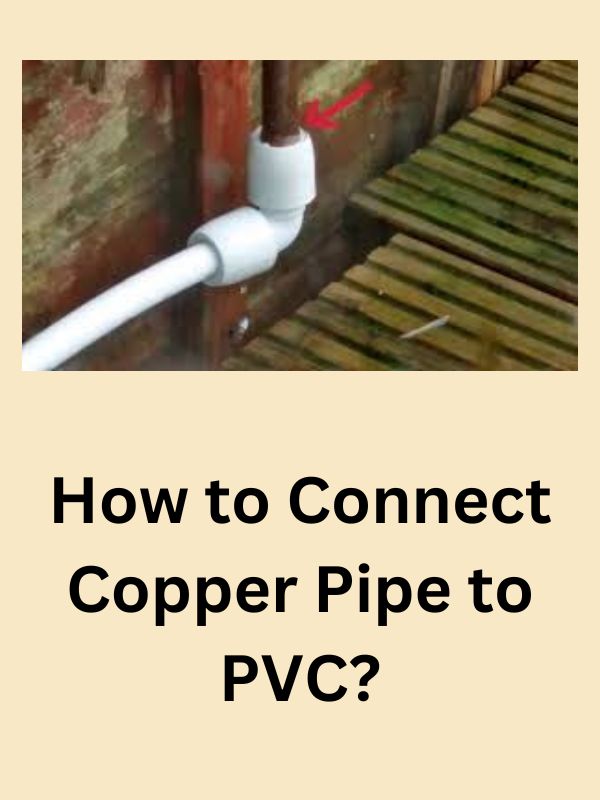
How to connect copper pipe to PVC? This comprehensive guide answers that question and provides step-by-step instructions, tips, and best practices for seamlessly joining these two pipe materials in plumbing projects. Whether you’re a DIY enthusiast or a professional plumber, understanding the techniques and considerations involved is crucial for reliable and durable connections. In this article, we will explore various methods, highlight the necessary tools and materials, address common challenges, and provide maintenance tips to ensure successful copper-to-PVC connections. Get ready to enhance your plumbing skills and tackle a range of projects confidently.
Understanding the Need for Copper-to-PVC Connections
When it comes to plumbing projects, there are various situations and scenarios where connecting copper pipe to PVC becomes necessary. Understanding the need for these connections can help you make informed decisions and achieve optimal results in your plumbing endeavors.
One common scenario where copper-to-PVC connections are required is during renovations or repairs in older homes or buildings. Copper pipes have been widely used in plumbing systems for many years due to their durability, corrosion resistance, and long lifespan. However, as technology and building materials have evolved, PVC pipes have gained popularity due to their affordability, versatility, and ease of installation.
In situations where you encounter existing copper pipes but wish to incorporate PVC pipes for new additions or extensions, connecting copper to PVC becomes essential. This allows for a seamless transition between the two pipe materials, ensuring compatibility and efficient plumbing system integration.
One of the key advantages of copper pipes is their exceptional heat resistance, making them suitable for hot water supply lines. On the other hand, PVC pipes are known for their resistance to chemical corrosion, making them ideal for handling various fluids, including wastewater and drainage.
By combining copper and PVC pipes, you can harness the benefits of both materials. The heat resistance of copper ensures the safe conveyance of hot water, while the chemical resistance of PVC ensures the efficient handling of wastewater and other fluids. This versatility allows for greater flexibility in designing and implementing plumbing systems that cater to specific needs and requirements.
In certain applications, such as under-sink connections, combining copper and PVC pipes can provide a cost-effective and reliable solution. Copper-to-PVC connections offer a balance between performance and affordability, making them an attractive option for both residential and commercial plumbing projects.
Understanding the advantages and properties of copper and PVC pipes, as well as the benefits of combining these materials, lays the foundation for successfully implementing copper-to-PVC connections in your plumbing endeavors.
Essential Tools and Materials
To connect copper pipe to PVC, you’ll need a range of tools and materials to ensure a proper and secure connection. Here is a comprehensive list of items you’ll need for the task:
- Copper Pipe Cutter: This tool allows you to make clean and precise cuts on copper pipes. Ensure you have a cutter that is suitable for the pipe size you are working with.
- PVC Pipe Cutter: Similarly, a PVC pipe cutter is essential for cutting PVC pipes accurately. It is designed specifically for PVC and ensures clean cuts without crushing or deforming the pipe.
- Emery Cloth or Sandpaper: These abrasive materials are used to clean and smooth the ends of the copper pipes and PVC pipes before making the connection. This step ensures better adhesion and prevents leaks.
- Transition Fittings: Transition fittings are specifically designed to connect copper pipe to PVC. These fittings have different ends: one end that connects to the copper pipe and the other end that connects to the PVC pipe.
- PVC Cement: PVC cement, also known as solvent cement, is used to bond the PVC pipes and fittings together. It creates a strong and reliable connection when applied correctly.
- Flux and Solder: When connecting copper pipes, flux and solder are used to create a watertight seal. Flux is applied to the cleaned copper pipe joints, and then solder is melted using a torch, ensuring a secure bond.
- Adjustable Wrench: An adjustable wrench is necessary for tightening the transition fittings and ensuring a snug connection.
- Safety Gear: As with any plumbing project, it’s crucial to prioritize safety. Wear protective gear such as safety glasses, gloves, and appropriate clothing to protect yourself from potential hazards.
Remember, selecting the appropriate connectors, fittings, and transition couplings is crucial for a successful connection between copper pipe and PVC. It’s essential to choose fittings that are specifically designed for the transition from copper to PVC, as they ensure compatibility and a leak-free connection.
Additionally, always follow safety measures and wear the necessary protective gear when working with pipes and tools. Safety glasses protect your eyes from debris and solder splatter, while gloves provide protection from sharp edges and potential burns.
Having the right tools and materials, along with adhering to safety precautions, sets the stage for a smooth and secure copper-to-PVC connection process.
Methods for Connecting Copper Pipe to PVC
When it comes to connecting copper pipe to PVC, there are several techniques you can employ. Each method has its own advantages and considerations, so it’s important to understand the various options available. Let’s explore three common techniques: soldering, compression fittings, and transition couplings.
Method 1: Soldering
Soldering is a widely used technique for connecting copper pipes, and it can also be used to join copper to PVC. Here’s a step-by-step guide on how to connect copper pipe to PVC using soldering:
- Measure and cut the copper and PVC pipes to the desired lengths using a copper pipe cutter and PVC pipe cutter respectively. Ensure the ends are clean and free from burrs.
- Use emery cloth or sandpaper to clean the outside of the copper pipe and the inside of the PVC pipe where they will be joined. Apply flux to the cleaned areas.
- Insert the copper pipe into a transition coupling designed for copper-to-PVC connections. Ensure the pipe is fully inserted.
- Heat the transition coupling with a torch, applying heat evenly around the coupling. The flux will help distribute the solder and create a strong bond.
- Once the coupling is heated, apply solder to the joint. The solder should melt and flow into the joint, creating a secure connection. Allow the joint to cool and solidify.
Pros of Soldering: Soldering provides a strong and reliable connection. It is a durable method that can withstand high temperatures and pressures. It also creates a watertight seal.
Cons of Soldering: Soldering requires some skill and experience to ensure proper application. It involves working with open flames and hot materials, so safety precautions must be followed. Soldering may also require additional tools and equipment.
Method 2: Compression Fittings
Compression fittings are another option for connecting copper pipe to PVC. Here’s a step-by-step guide on how to connect copper pipe to PVC using compression fittings:
- Measure and cut the copper and PVC pipes to the desired lengths using appropriate pipe cutters. Ensure the ends are clean and free from burrs.
- Slide a compression nut onto the copper pipe, followed by the compression ring.
- Insert the copper pipe into the compression fitting designed for copper-to-PVC connections.
- Tighten the compression nut onto the fitting using an adjustable wrench. Ensure it is securely tightened, but avoid over-tightening.
- Test the connection for leaks by running water through the pipes. If any leaks are detected, tighten the compression nut slightly.
Pros of Compression Fittings: Compression fittings are easy to install and require no special tools or soldering. They provide a secure and removable connection, allowing for future disassembly if needed.
Cons of Compression Fittings: Compression fittings may be bulkier than other methods, which can limit their use in tight spaces. They may also be more expensive compared to other connection methods.
Method 3: Transition Couplings
Transition couplings are specifically designed to join copper and PVC pipes. Here’s a step-by-step guide on how to connect copper pipe to PVC using transition couplings:
- Measure and cut the copper and PVC pipes to the desired lengths using appropriate pipe cutters. Ensure the ends are clean and free from burrs.
- Apply PVC cement to the inside of the transition coupling and the outside of the PVC pipe. Insert the PVC pipe into one end of the coupling and twist it slightly to ensure a secure bond.
- Apply flux to the outside of the copper pipe and the inside of the other end of the transition coupling.
- Insert the copper pipe into the other end of the transition coupling, ensuring it is fully inserted.
- Heat the transition coupling with
Troubleshooting and Common Challenges
While connecting copper pipe to PVC can be a straightforward process, it’s important to be aware of potential challenges that may arise. Here are some common issues you may encounter and troubleshooting tips to overcome them:
- Leaks: If you notice leaks at the joint, it could be due to inadequate sealing. Make sure you have properly applied flux and solder (if using soldering) or tightened the compression fittings securely. If the leak persists, disassemble the joint, clean the surfaces, and reapply flux or consider using a different sealing method.
- Misalignment: Misalignment between the copper and PVC pipes can make it difficult to achieve a proper connection. Double-check your measurements and ensure the pipes are cut accurately. If misalignment occurs, use a pipe cutter to trim the ends and try again.
- Inadequate Sealing: Inadequate sealing can result in weak joints and potential leaks. Ensure that you have applied the appropriate sealant, such as flux and solder or PVC cement, according to the manufacturer’s instructions. Consider using Teflon tape or pipe thread sealant on threaded connections for added sealing.
- Pipe Compatibility: Confirm that the copper and PVC pipes you are using are compatible in terms of size and type. Verify that the transition couplings or fittings are designed specifically for copper-to-PVC connections.
- Heat Control: When using soldering, it’s crucial to control the heat properly. Excessive heat can damage the pipes or cause weak joints. Use a suitable torch and apply heat evenly around the joint, ensuring that the flux and solder melt and flow smoothly.
If you encounter any of these challenges, take a step back, assess the situation, and make the necessary adjustments. Remember, practice and patience are key to mastering the connection process. If needed, consult a professional plumber for guidance or assistance.
By troubleshooting and addressing these common challenges, you can ensure a reliable joint and a successful connection between copper pipe and PVC.
Testing and Inspecting the Connection
Once you have successfully connected the copper pipe to PVC, it is crucial to test and inspect the joint to ensure its integrity and functionality. Testing and inspection help identify any potential leaks or issues that may require adjustments or repairs. Here are some key points to consider:
- Pressure Testing: One of the most effective methods for testing the connection is pressure testing. This involves pressurising the system with air or water to check for any leaks or weaknesses. Follow the recommended pressure specifications provided by your local plumbing codes or manufacturer guidelines. Observe the joint carefully and check for any signs of leakage or pressure drops.
- Visual Inspection: Conduct a thorough visual inspection of the joint to identify any visible defects, such as gaps, cracks, or misalignments. Ensure that all connections are secure and tightly fitted. Look for signs of moisture, discoloration, or dripping around the joint area.
- Making Adjustments: If you notice any issues during testing or inspection, it is important to address them promptly. Depending on the problem, you may need to disassemble the joint, clean the surfaces, reapply flux or sealant, and reconnect the pipes. Follow proper procedures and ensure a secure and leak-free connection.
- Repeating the Testing Process: After making adjustments or repairs, repeat the testing process to verify the effectiveness of the modifications. This will help ensure that the connection is now reliable and leak-free.
By testing and inspecting the copper-to-PVC connection, you can identify and rectify any potential issues, ensuring that your plumbing system operates smoothly and without leaks. Regular maintenance and periodic inspections are also recommended to ensure the continued integrity of the joint over time.
Maintenance and Longevity
Regular maintenance is crucial for ensuring the longevity and reliability of the copper-to-PVC connection. By following some simple maintenance practices, you can preserve the integrity of the joint and prevent potential issues. Here are some essential tips:
- Periodic Inspections: Regularly inspect the copper-to-PVC connection for any signs of deterioration, such as leaks, corrosion, or loosening fittings. Perform visual checks and, if necessary, conduct pressure tests to identify potential problems early on.
- Addressing Leaks Promptly: If you notice any leaks or dripping around the joint, it is important to address them promptly. Determine the cause of the leak and take appropriate measures to fix it. This may involve tightening fittings, reapplying sealant, or replacing damaged components.
- Avoiding Chemical Damage: Be mindful of the chemicals that come into contact with the copper-to-PVC connection. Some chemicals, such as harsh solvents or corrosive substances, can degrade the joint over time. Ensure that any chemicals used in the vicinity of the connection are safe for the materials involved.
- Preventing Physical Damage: Protect the copper-to-PVC connection from physical damage. Avoid hitting or applying excessive force to the joint during regular usage or maintenance activities. Be cautious when working in the vicinity of the connection to prevent accidental damage.
- Regular Cleaning: Keep the joint clean by removing any debris or buildup that may accumulate over time. This can help prevent clogs or blockages that may impact the performance of the plumbing system.
By incorporating these maintenance practices into your routine, you can extend the lifespan of the copper-to-PVC connection and ensure its continued functionality. Remember to consult with a professional plumber if you encounter any persistent issues or require expert advice on maintenance and repairs.
Releted Post :Can you use Plumbing PVC for Electrical Conduit? |Can you run Romex in PVC Conduit? |Can I use White PVC for Electrical Conduit?|Will salt damage PVC pipe? |How to Remove Dried PVC Glue from Pipes?|How to Thread PVC Pipe for Your Projects|How Long Does PVC Pipe Last? | Innovative PVC Pipe Dishwasher Designs for Modern Kitchens
Conclusion
In conclusion, mastering how to connect copper pipe to PVC is essential for various plumbing projects. By following the step-by-step instructions, utilising the proper tools and materials, and addressing potential challenges, you can achieve reliable and durable connections. Remember to prioritise safety, conduct regular maintenance, and stay informed about industry best practices. With this comprehensive guide, you’re well-equipped to confidently undertake copper-to-PVC connections and enhance your plumbing skills.